by Caroline | Nov 20, 2018 | Wellness, Yoga
Yoga is great for improving your sleep because gets you in touch with the breath, which is something we don’t really think about during the day. But I’m not talking about your average yoga class where you do a lot of moving.
Tonight I’m going to show you some poses that you will hold for a longer amount of time. Yep, you heard that right, no flowing from one pose to another. Basically you’re just gonna sit there for a while to allow your body to fully relax.
When you slow down the breath, and stay in a pose for a longer amount of time you can feel different areas of the body that are tense and holding on from your day and gradually let that go as you sit and breathe through the pose. And stretching in general has a calming effect. Restorative yoga is great for calming the mind and body after a long day and helping you prepare for sleep
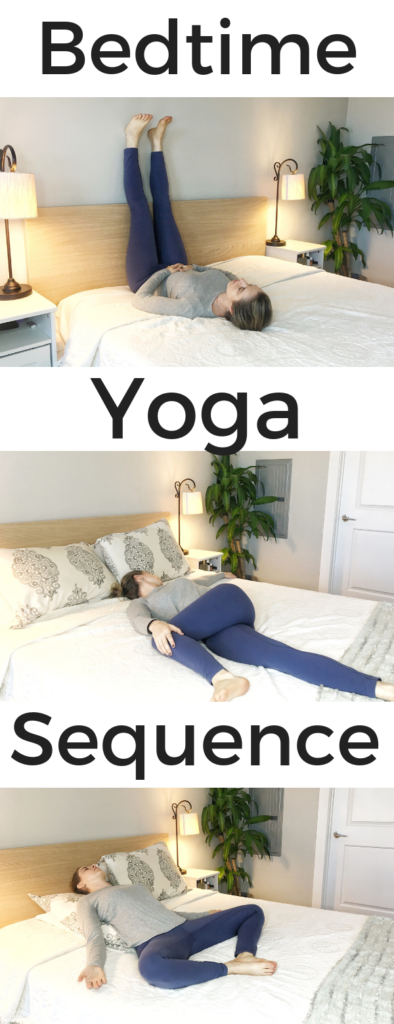
Here are some of my favorite yoga poses to do to help me fall asleep, and you can do all of them from the comfort of your own bed.
Ideally you want to do each pose for one to five minutes, holding each position gently without strain or pain for as long as feels comfortable to you. Can’t manage the full sequence? Pick your favorites and build them into your routine as you can.
- Stack two pillows on top of each other this will (mimic the support of a bolster typically found in a yoga class)
- Position yourself sitting with the end of the pillows touching your tailbone.
- Bring the souls of your feet together, letting your knees splay out to the sides If that is not comfortable you can place two pillows under each knee for a little more support.
- Slowly lower yourself down on the pillows making sure that your head is supported your neck is comfortable.
- Close your eyes and place your hands anywhere you feel comfortable, either on your lower abdomen, tops of thighs, or arms out at your sides palms facing up.
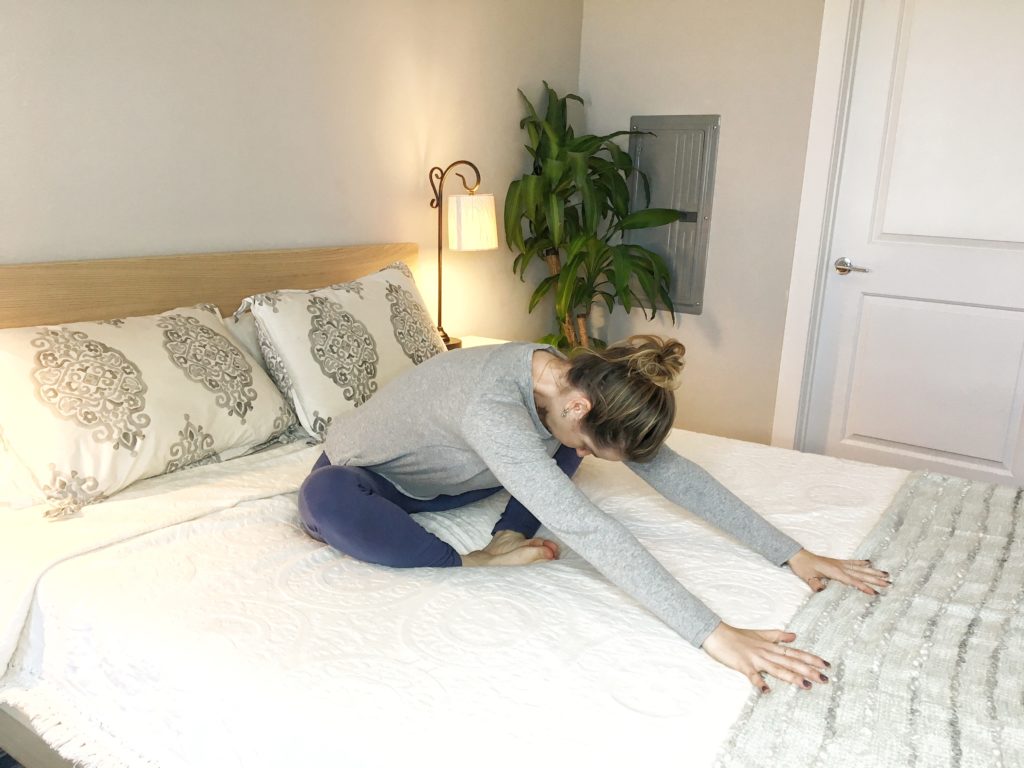
Bound Angle Forward Bend
- Come to a comfortable seat with the soles of your feet touching, letting your knees splay out to the sides. This is the same set up for reclining bound angle pose but without the pillows
- Reaching your arms out in front of you slowly bend forward to whatever level is comfortable to you.
- You may want to keep your arms straight, or if your hips are flexible bend your elbows and place your forearms on the bed.
- Slowly let your head release feeling the stretch in the back of your neck and upper back. If your back is tight you may not want to bend too deeply, but this is where you listen to your body and do what feels best.
- Once you have found a comfortable posture hold for 1-3 minutes, allowing yourself to release more and more tension in the neck as your body becomes more and more relaxed.
*Good to know!* Forward bend postures in general are great for bed time because they promote turning inward, away from the world, and into yourself, a great practice when letting go of the day.
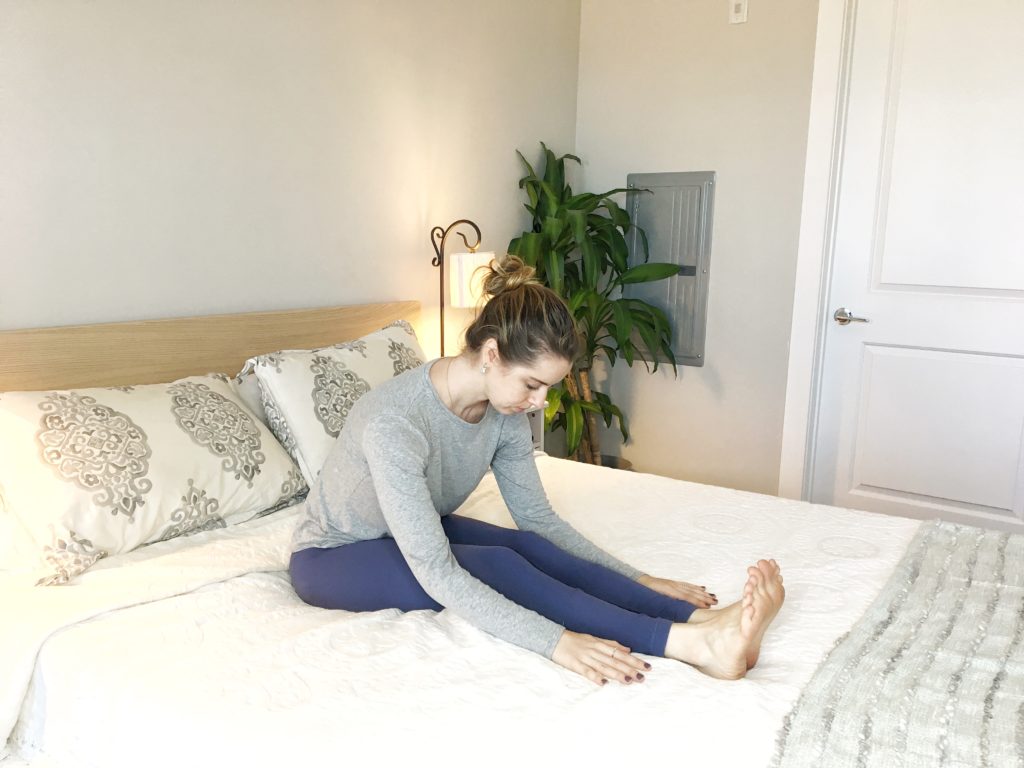
Seated Forward Bend
- Begin in a seated position with your legs extended out in front of you.
- Stretch your arms up to elongate your spine and slowly bend forward hinging from the hips.
- Make sure you try to keep your back flat instead of rounding your spine and bending from your mid back.
- If this is too much for a stretch you can slightly bend your knees.
- With each inhale, slightly lift and lengthen the torso, and with each exhale, release and fold a little more.
- Hold this for 1-3 minutes
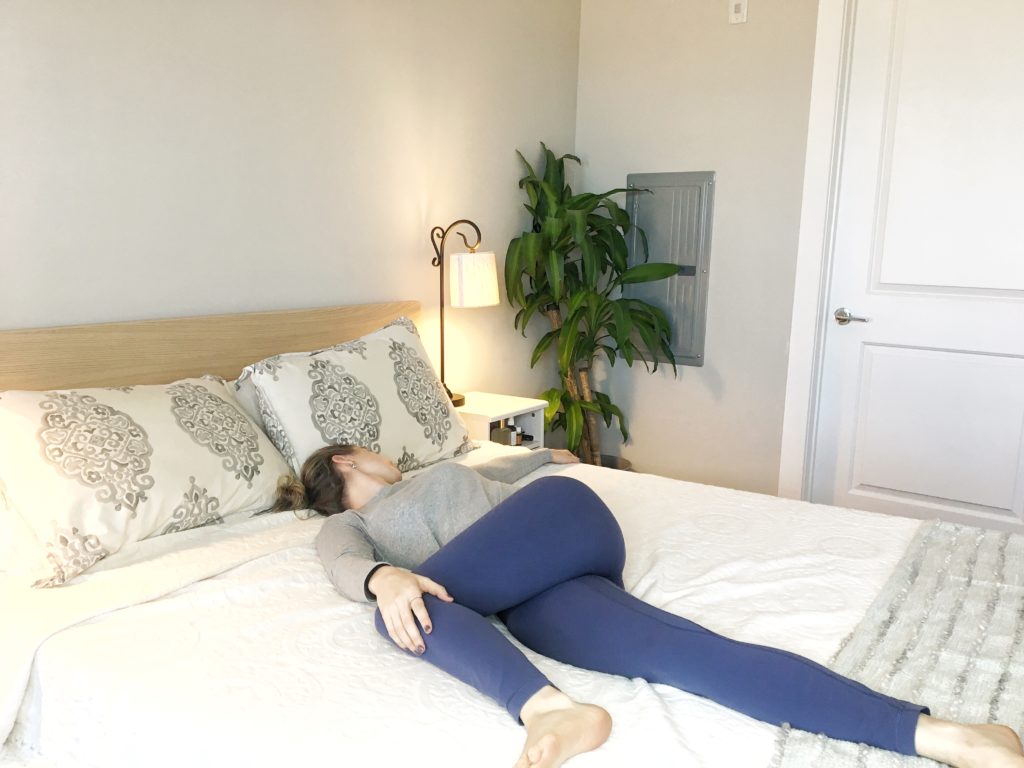
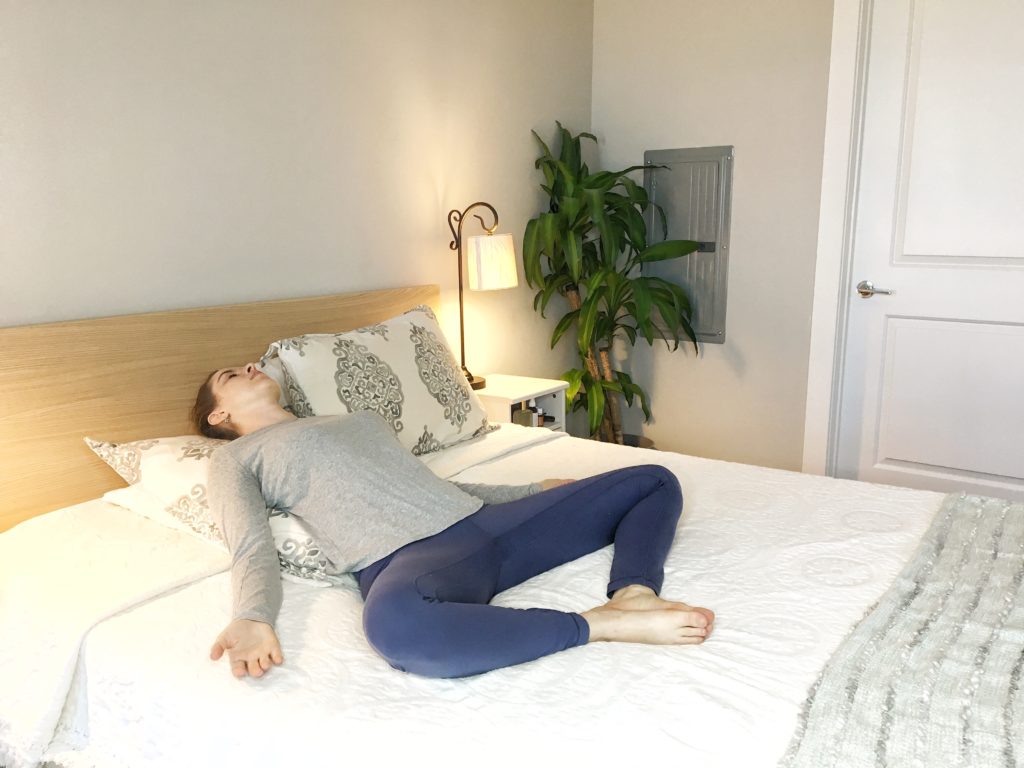
Reclined Twist
- Lay flat on your back and hug your right knee into your chest
- Slowly bring it across your body to rest on your left side using your left hand to guide it and letting your right hip lift up so your hips face the left side if the room.
- You can keep the left leg straight or bend it along with the right leg as well.
- Keeping your shoulders flat on the bed, turn your head to look over your outstretched right arm.
- You will feel a gently twisting of your spine and torso as your hips face left and your head points right.
- Hold this pose for 1-2 minutes, or however long feels good for you, and repeat on the other side.
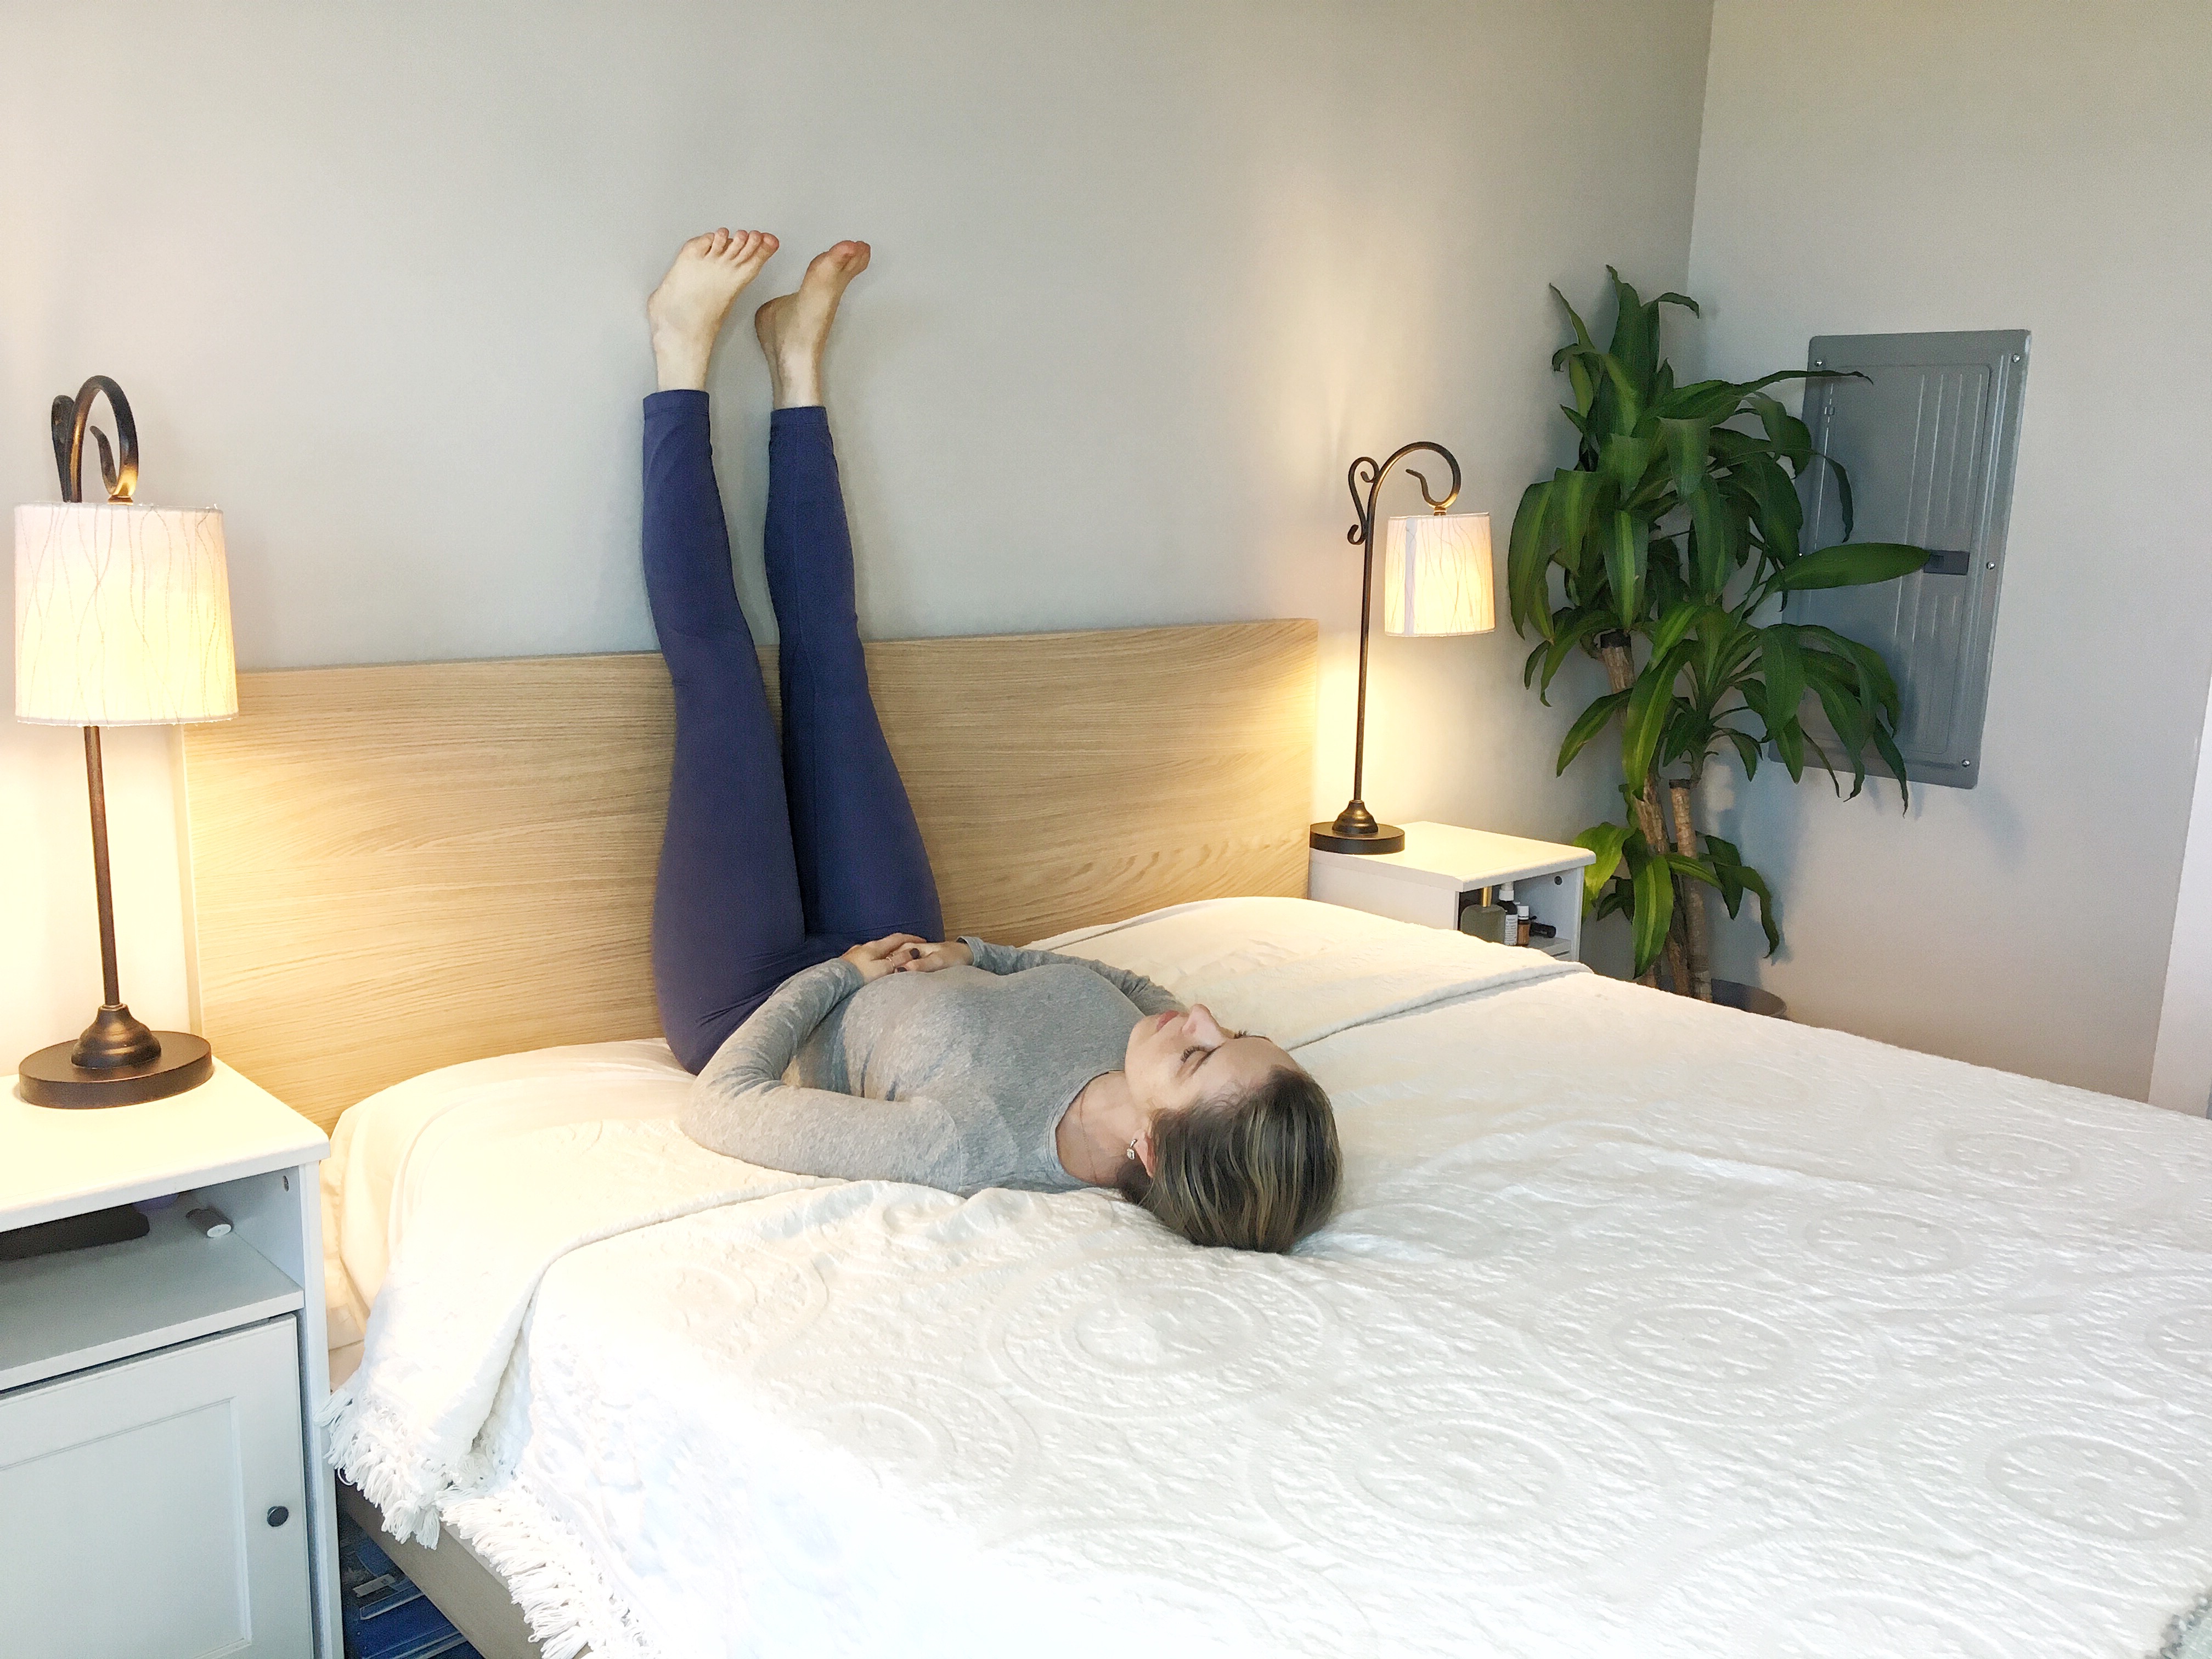
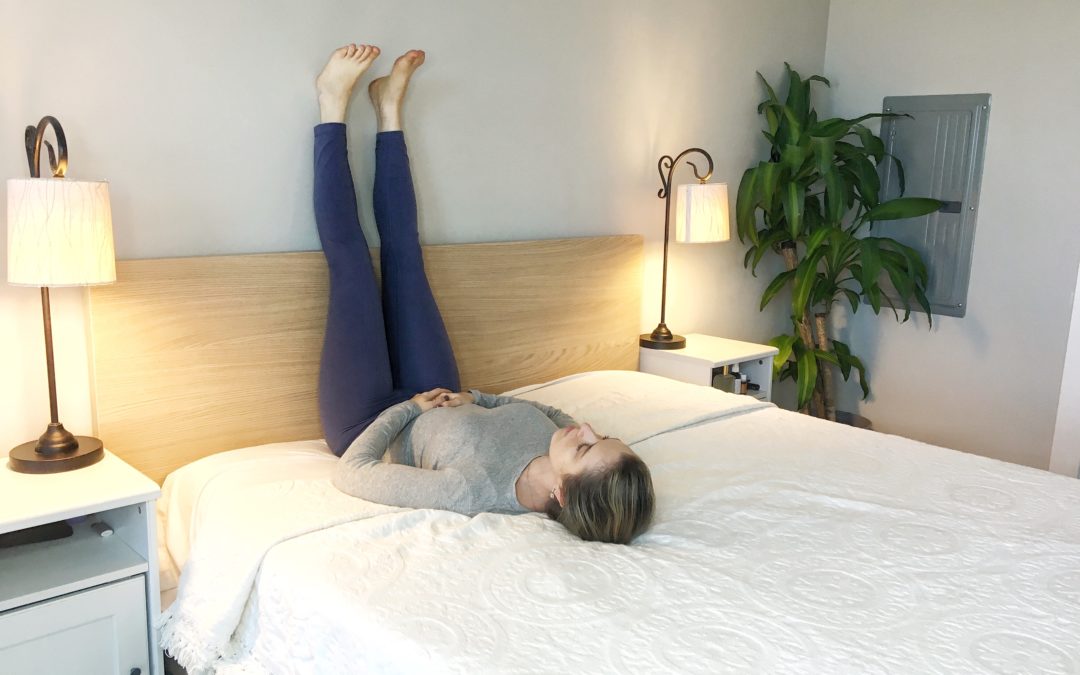
Legs up the wall
- The easiest way to get your butt as close to the wall (or your headboard) as possible is to start by sitting with one of your hips touching the wall, then slowly bringing your legs up the wall, almost like the hands of the clock. (watch the video if this seems confusing)
- Laying flat on your bed or the floor extend your legs straight up the wall, taking a slight bend in the knee if that’s comfortable.
- If your hamstrings are too tight you can try this pose with a pillow or bolster underneath your hips to give them some lift.
- If you have props at home you can use a strap around the thighs for extra support or place a sand bag on the soles of the feet for a wonderful grounding sensation.
- Hold this pose for up to 5 minutes or longer, going with what feels best for you.
*This is an all time favorite pose for relaxation after a busy day*
Watch the the whole sequence here!
Like this?
Share it on Pinterest!
by Caroline | Nov 19, 2018 | Mindful Home, Sustainability
One thing that I’ve been thinking about a lot lately is how much plastic and paper waste a single person produces in a day. There are so many things that we use once and throw away without even thinking twice about it. Unfortunately we’re getting to that point where we really should be more conscious of what our consumption is doing to the planet. Especially during the holidays it’s hard to comprehend just how much plastic and paper is wasted and thrown into the landfill.
Luckily you don’t have to take it to extremes to make a dent in the waste that you are creating this holiday season. There is a powerful Zero Waste Movement happening right now that focuses on making simple swaps for every day items, which means less going into the garbage at the end of the day.
Here are some ideas to get you started being a more conscious consumer. Especially now that the holidays are upon us, a time when there is so much unnecessary waste.
Minimize Single Use Plastic
Simple things like having reusable travel utensils in your car so you don’t have to use plastic forks and knives at Starbucks (I’m totally guilty of that). Same goes for plastic straws, which are wreaking havoc on marine life. By getting some reusable stainless steel straws you can make a simple swap that also helps the environment.
More and more people recently have made it a habit to take their reusable grocery bags to the store, but have you ever though of how much plastic you are wasting with the produce bags you put your greens and other veggies in? Their lifespan is only as long as the veggies you put in them, then they go right in the trash. A smile solution is taking your own produce bags to the grocery store along with your own grocery bags. Same goes for Zip-lock bags, which I use almost every day when I go to work. Instead try using the cute Stasher Reusable Food Bag.
Many businesses and towns are even doing away with plastic bags and straws all together! My hometown got rid of plastic bags in grocery stores and charge people for each brown bag they use. Not only does it cut down on plastic bags which pollute out environment, but the extra charge (which was only like 5 cents or something) was enough incentive to try to remember my reusable bags each time I went shopping.
Another thing is to be aware of what you are purchasing, either as its or just in general. Are you getting gifts for people that come in a ton of plastic packaging or requires bubble wrap because of shipping? Note I’m a huge fan of online shopping for the sanity it saves me, but these are things to be aware of.
Waste Free Gift Wrapping
One of the biggest waste issues around the holidays is all of the gift wrapping and boxes that get thrown out. When I think about it I find it kind of insane that we will use expensive paper for the sole purpose of ripping it up and throwing it out after 5 seconds. I mean, I love how presents look all pretty and wrapped up, but there are more creative, and sustainable ways, to make presents look beautiful.
One way is to use reusable gift wrapping. I found these stretchy fabric bags that can fit around different size boxes and can be used over and over. If you’re not into reusable gift wrapping you can always skip the wrapping paper and reuse gift bags. I know in my family we never have to buy new ones because my mom has a whole closet full of saved gift bags that we just use year after year.
Get creative with brown paper bags. I love using brown paper bags from the grocery store (when I forget my reusable grocery bags of course!) and cutting them up to use as wrapping paper. They are a blank canvas for making fun art that makes each gift unique. Using paint, crayons, stamps, and stickers is a great way to decorate them for any season or holiday, and it’s free! One year my mom used brown paper to wrap all our presents and used Christmas-ey stamps and twine to make them look beautiful! It was an art project in itself, and made wrapping more enjoyable.
Action Step: Here’s something I want you to try…
Tomorrow from the moment you wake up until you go to sleep, notice how much you throw away, or how much unnecessary paper and plastic are a part of your everyday life. Paper towels, ziplock bags, the plastic wrap on food containers, junk mail, makeup remover pads, produce bags, receipts, all of it. Just by becoming aware of how much unnecessary waste you accumulate in one day can be a big motivator in making tiny changes.
And if you’re really interested in learning about more ways you can live a zero waste life (or close to it) is to check out the book, aptly named Zero Waste Home.
I am an affiliate of Amazon, which means that if you make a purchase from any of these links I may make a small commission, as no extra cost to you. This helps me maintain and run this website and keep putting out good content for you all to enjoy. Thank you for supporting Bloom & Spark!
by Caroline | Nov 3, 2018 | Recipes, Wellness
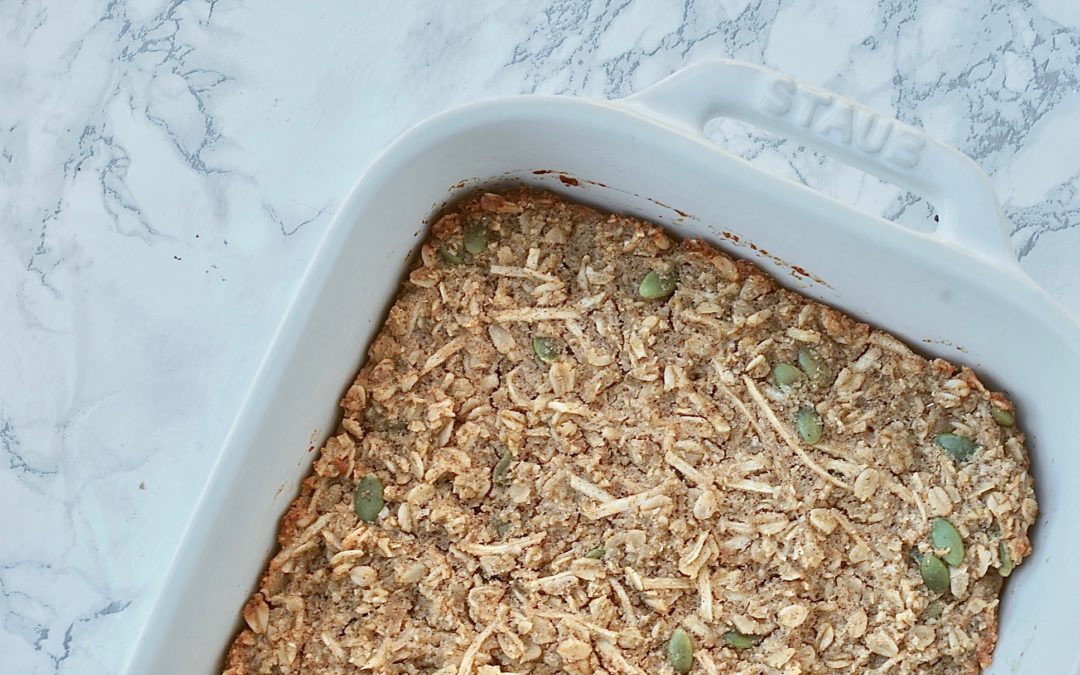
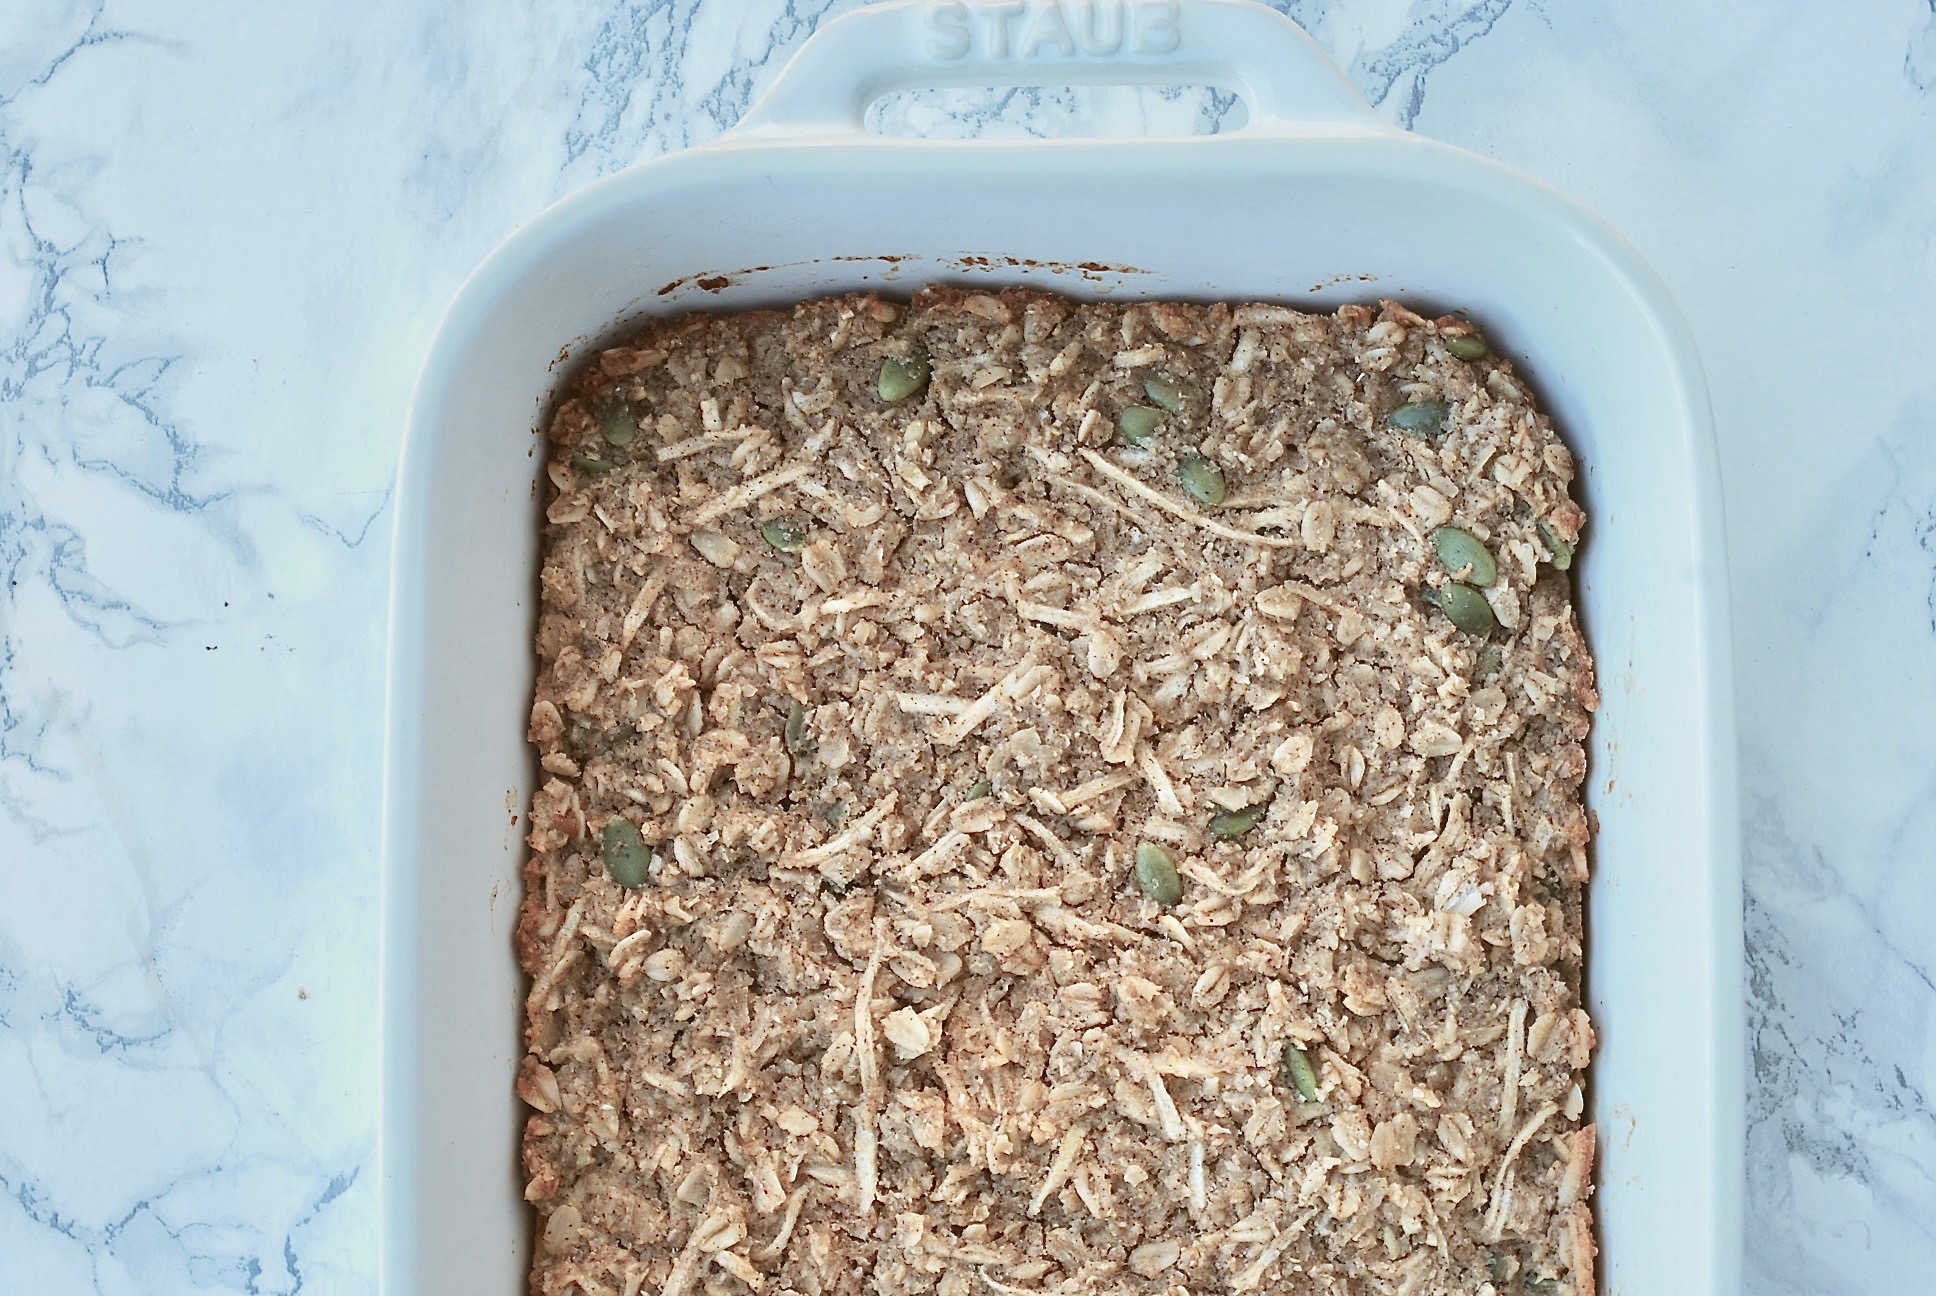
Having these apple pumpkin seed to-to bars on hand during the week made my life so much easier. Work has been picking up, and I’ve been leaving the house around 7:30 AM each morning. As the person who hits snooze till the last possible second, having something I could just grab out of the fridge and eat on my way to work was a life saver. Though I don’t recommend eating on the go, sometimes we have to, and when we do it’s best to be prepared.
Since it’s now Autumn, we want all the pumpkin and/or apple flavored everything right? These apple pumpkin seed to-go bars are my new favorite, and I will be making them every Sunday in preparation for the week ahead. They are healthy enough for breakfast, but they have just the right amount of sweetness to satisfy my after dinner sugar cravings without reaching for cookies or ice cream.
This is especially helpful for working women (like me) or busy moms who feel like they have to choose between heating healthy and having quick solutions on a hectic schedule. It’s my goal to make it easier!
And for all of you who don’t do grains, check out a my recipe Paleo Apple Cinnamon “Oatmeal” I did last year that feels like oatmeal, but it’s not!
Ingredients:
- 2 1/2 cups quick rolled oats
- 1 1/2 tsp cinnamon
- 1 apple (I like granny smith for baking) grated or shredded into thin strips- I used a mandolin slicer to shred the apple
- 1/2 tsp baking powder
- 1/4 tsp salt
- 1 cup milk or nut-milk of your choice
- 1 snack cup size of apple sauce (measures out to 1/4 cup and 2 tbsp if you’re not using apple sauce from snack cups)
- 1/4 cup maple syrup
- 1/4 c melted coconut oil
- 1/4 cup pumpkin seeds or nut of your choice (this measurement can totally be adjusted based on how much you want in the bars)
Directions:
- Preheat the oven to 350 and prepare a small to medium baking dish with some non stick spray. An 8×8 dish is a great standard size. Mine was more of a 10×7 but I don’t think it makes much of a difference. I follow the goldilocks rule…not too big and not too small. 😉
- Mix the dry oats, cinnamon, baking powder, and salt together in a medium bowl.
- In another bowl mix together the wet ingredients (milk, apple sauce, maple syrup, shredded apple, and coconut oil). *Here’s a tip, don’t let the wet mixture sit for too long or else the cold milk will harden the melted coconut oil. Learned that the hard way.*
- Slowly combine the wet ingredients into the dry ingredients and stir until it’s an even mixture.
- At this point add any nuts/seeds or other fun additions you might like. I used pumpkin seeds and they were delicious!
- Pour the mixture into the baking dish and pop that baby in the oven for 35-40 minutes.
Here are some ways you can change it up to meet your taste preferences or dietary needs…
- If you aren’t into maple syrup you can substitute any sweetener of your choice. I would stick with a liquid though or it might throw off the consistency, but HEY you might come up with an even better recipe in the process! Or try varying the amounts if you prefer to not have the bars too sweet, switch out the maple syrup for another serving of apple sauce. Just experiment!
- Maybe pumpkin seeds aren’t your thing, if so some great options are walnuts and pecans.
- You can even get really adventurous and put some dried cranberries in here too.
Enjoy!!!!
by Caroline | Oct 15, 2018 | Self Care
When we are in “bus-y mode” that feeling like you just can’t stop, and dealing with overwhelm, it can be really hard to relax even if you know you should. You might start to worry about all the bad things that will happen if you take a break, or if that to-do list doesn’t get checked off. Welcome to overwhelm my friend, I know this neighborhood well.
I know this feeling of dealing with overwhelm all too well. Most of us actually get addicted to “busy-mode” because there’s a certain rush in accomplishing tasks. That satisfying feeling of having all your items on the list crossed off like you are superwoman of task management (ok that’s doesn’t really sound so exciting after all). We start to get that feeling like we HAVE to do all the things or the world is going to end.
Well, the weight of the world doesn’t rest on your shoulders alone, in fact by you driving yourself into the ground, those things are less likely to get done in the end anyway.
So I started putting more value on the time I spent that was not meant for doing anything productive. This was REALLY strange at first. I call it “Purposeful Purposelessness” (Ok I’ll work on the title).
We can get so addicted to checking things off the to do list, that we forget that getting our energy back can often occur in those moments when we are not doing anything with an outcome in mind. This may look different for everyone. Even Psychology Today wrote about the benefits of purposeless behaviors.
Here are some things you can do that are totally and blissfully purposeless
Go to the library or Barnes & Noble and just browse with no intention of getting anything.
Flip through books that catch your eye, get a cup of tea and browse through a beautiful home decor book or a fashion magazine. Look at a travel guide of a place you want to go to, or feed your soul in the personal development section. This is one of my favorite “me time” activities.
Most of the time when we go into stores is because we have to get something; a birthday present, there’s a new book club book you have to get, it’s fathers day tomorrow, etc. How about you just go for fun! It’s like a playground for book loving adults!
Browse Pinterest for your dream vacation
(note, don’t PLAN this vacation, this is about dreaming) just explore places you’ve always wanted to go to, look up the most expensive resorts you don’t ever plan on going to. Normally I try to stay away from screens for my purposeful purposeless activity, but Pinterest somehow always makes me feel good, I don’t know why!
Read a fiction novel
This one was actually really hard for me, because for about 5 years I only read personal development, nutrition, yoga, or spiritual books. I always thought that I HAD to be learning if I was going to be reading because otherwise it would be a waste of time. No, the idea IS to waste your time and be ok with it…and if you are relaxing and enjoying yourself then it’s not really a waste of time *wink*. Find a book that’s easy enough that it’s not a struggle to get through. Young adult novels, beach reads, and light murder mysteries are some of my favorites.
Take a walk without needing to go anywhere.
Enjoy looking at the homes in your neighborhood, go down a street you’ve never been down before. Be curious and explore. Wanter with no plan, just enjoy where the walk takes you.
Binge on your favorite blog
As a blogger I love looking at other peoples blogs. Everyone has their own unique voice, so even though there about a bazillion blogs out there, they are all different. Go through their old content, get to know the blogger, it’s not stalkerish I promise. That’s what blogs are there for! You can learn a lot by “blog-binging.” <<< I just made that up!
The idea of Purposeful Purposelessness is to do something that doesn’t produce an outcome, doesn’t check something off the to do list, isn’t something that NEEDED to get done, that nobody is counting on you to do. This is just for you. The key is FUN and/or relaxation. What would be fun right now? What would make you smile? The “purposeful” part comes in because you are meaning for this activity to have no real end results to show for it. You’re doing it on purpose, in contrast to just wasting time mindlessly.
by Caroline | Oct 7, 2018 | Recipes, Wellness
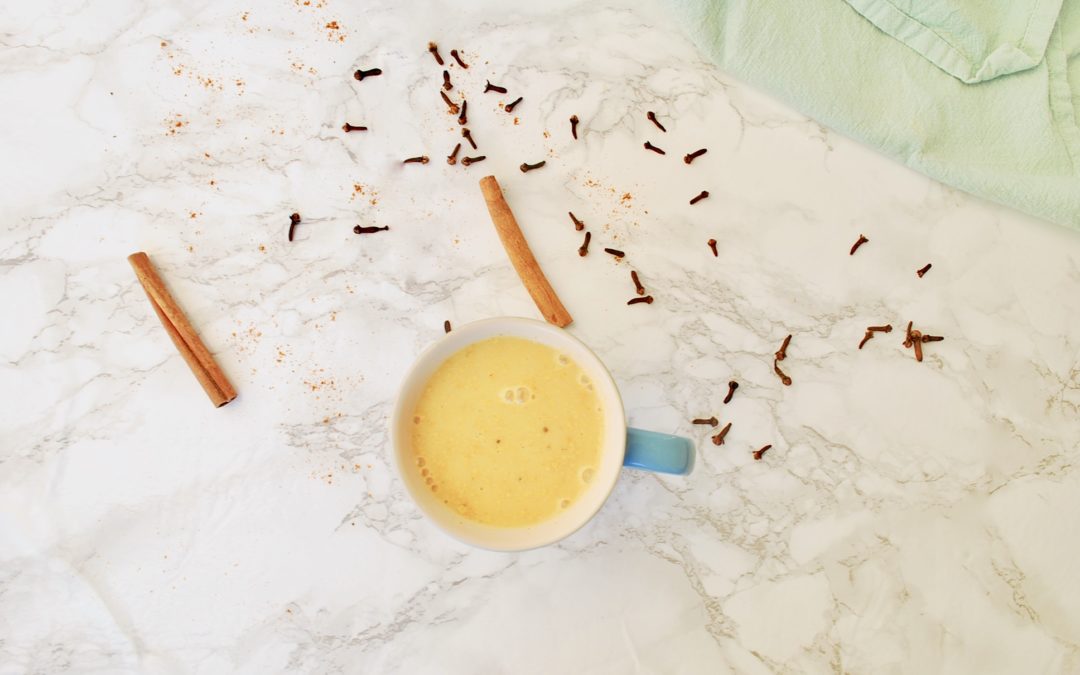
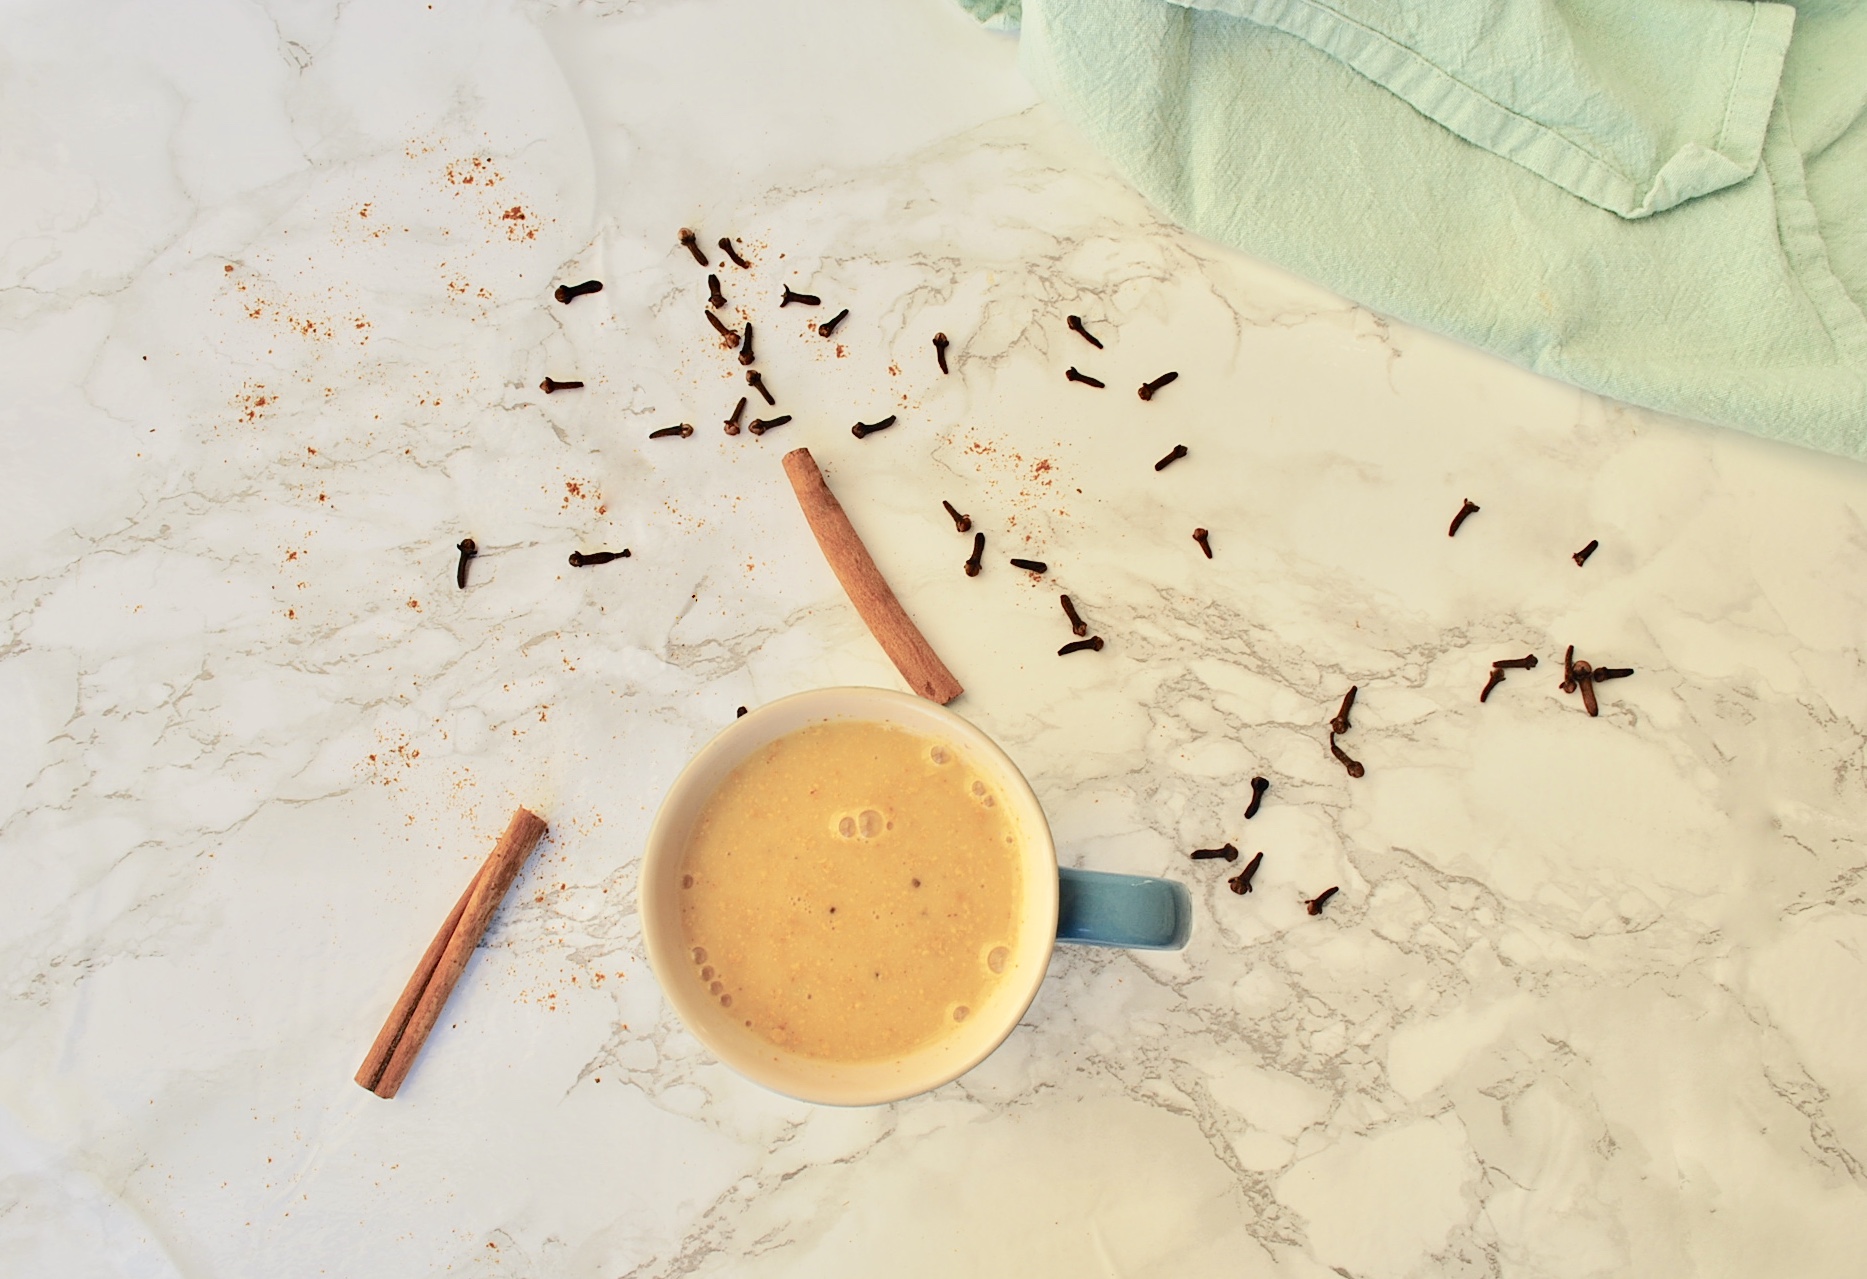
The Golden Turmeric Latte, or golden milk as it’s often called, has become a mainstay in the new wave of trendy wellness drinks. But turmeric actually has been around for centuries (like most things our society is re-discovering) and is used for it’s anti-inflammatory properties (oh yay, more new wave trendy wellness buzz words).
Why drink golden turmeric milk?
- Curcumin (the active component in turmeric) = antioxidant
- Cinnamon and ginger = also antioxidants
- These anti-inflammatory effects may reduce joint pain from osteoarthritis and rheumatoid arthritis.
- Curcumin may increase levels of brain-derived neurotrophic factor (BDNF) which is a compound that helps your brain form new connections and promotes the growth of brain cells.
- Curcumin has also been shown to have similar effects to antidepressants.
- Cinnamon, ginger, and turmeric have all been linked to a lower risk of heart disease and lower blood sugar levels.
- Curcumin has antibacterial, antiviral, and antifungal properties which may help prevent and fight infections.
- Turmeric may help reduce indigestion symptoms.
Golden Turmeric Milk recipe
* I want to note that if any ingredients or amounts don’t feel right for you, or just aren’t your thing, this recipe is really modifiable, and most of the time I don’t even use a recipe. This is a guideline, play around with different versions.
Ingredients:
- Turmeric
- Cinnamon
- Ginger
- Cardamom (optional)
- Nutmeg (optional)
- Clove (optional)
- Honey, vanilla extract (or any sweetener of your choice)
- Milk (cows, almond, coconut…any milk will do)
I added a variety of spices but don’t feel like you have to use them all. I generally use some variation of the above spices (always including turmeric, ’cause it wouldn’t be turmeric milk if I didn’t!). If you want to start out simple then turmeric, cinnamon, and ginger are the best way to go. If you want to add one of the optional spices, I suggest you add it at the end by just giving the spice jar a shake or two and go on taste.
The only measurements you need to know…
- 1 cup milk
- 1 tsp honey
- 1/2 teaspoon of turmeric
That is the most basic version of the recipe. Start there, then add in the cinnamon and ginger by giving it a few shakes at a time, letting your taste buds be your guide.
Directions:
- Heat 1 cup of your preferred milk in a small saucepan over medium/low heat (don’t bring to a boil).
- Stir in honey and spices and let warm up for about 5 minutes
- Stir occasionally so the spices incorporate.
- Taste as you go, and feel free to add some cinnamon and ginger. Don’t worry about not using measurements, a shake or two at a time will do the trick.
With all the recipes I share it’s my goal to give you not only recipes that are easily modifiable, but also recipes that don’t necessarily need strict measurements. I do this for two reasons:
- Anyone can follow a recipe, but what I love about cooking is developing the intuitive sense of putting together ingredients without a road map, and I want to inspire my readers to have the same intuitive approach.
- Strict recipes (aside from baking obvi) are somewhat off putting because if you’re missing one little ingredient it feels like you can’t make it, and I want you to feel like you can make this recipe what what you have at home right now.
The best ingredients are the ones you have in your kitchen at this very moment.
XO,
Caroline
Liked this? Pin it and share it with a girlfriend!